Learn how to create SMS surveys and WhatsApp survey using the Impaxio survey builder.
To prepare, navigate to the project you would like to use for your surveys. If you don't have a project yet, go to the dashboard and create a new project by clicking on "Create Project".
1) Go to the "Surveys" section in the project you would like to use
To create surveys and see all existing surveys in your project, navigate to the tab "Surveys". This is the page automatically shown whenever you navigate to one of your projects.
2) Create a new survey
To create a new survey, click on the button "Create Survey".
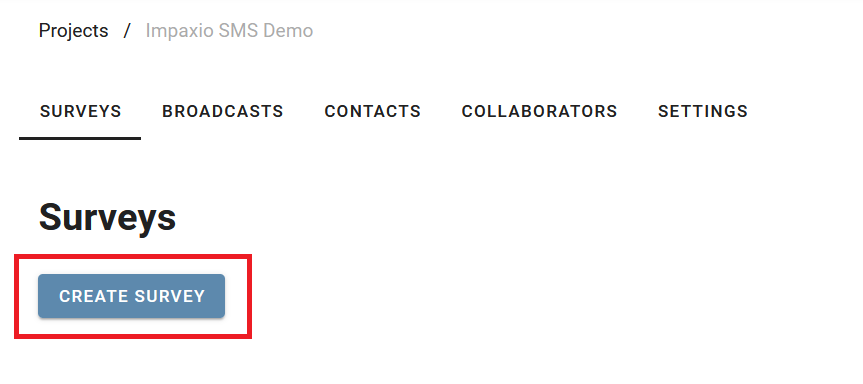
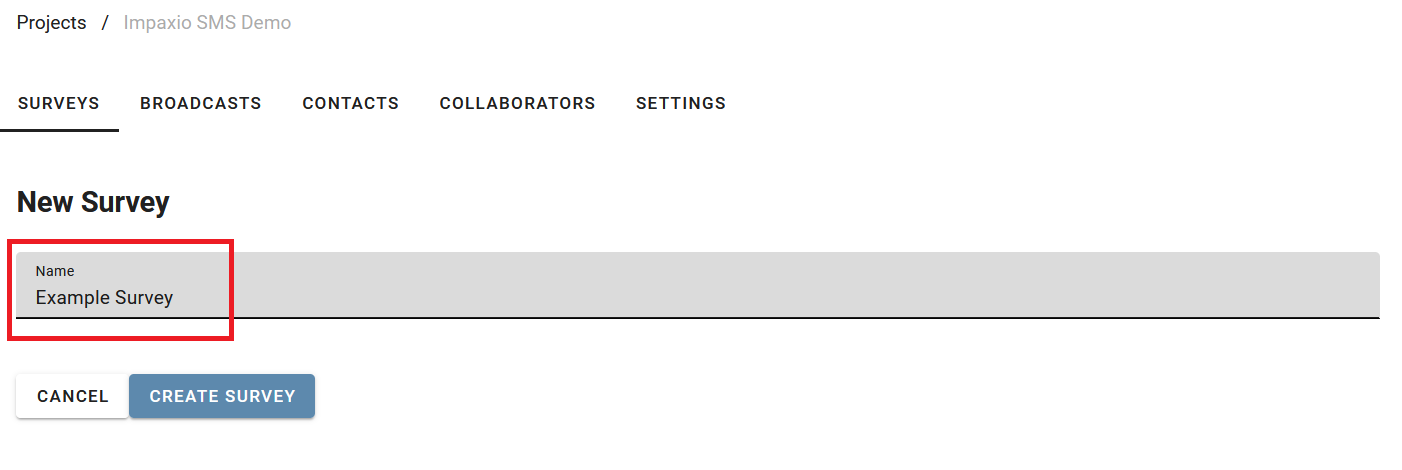
Then give your survey a name such as "Example Survey". Click on the button "Create Survey" to proceed.
3) Add your intro message
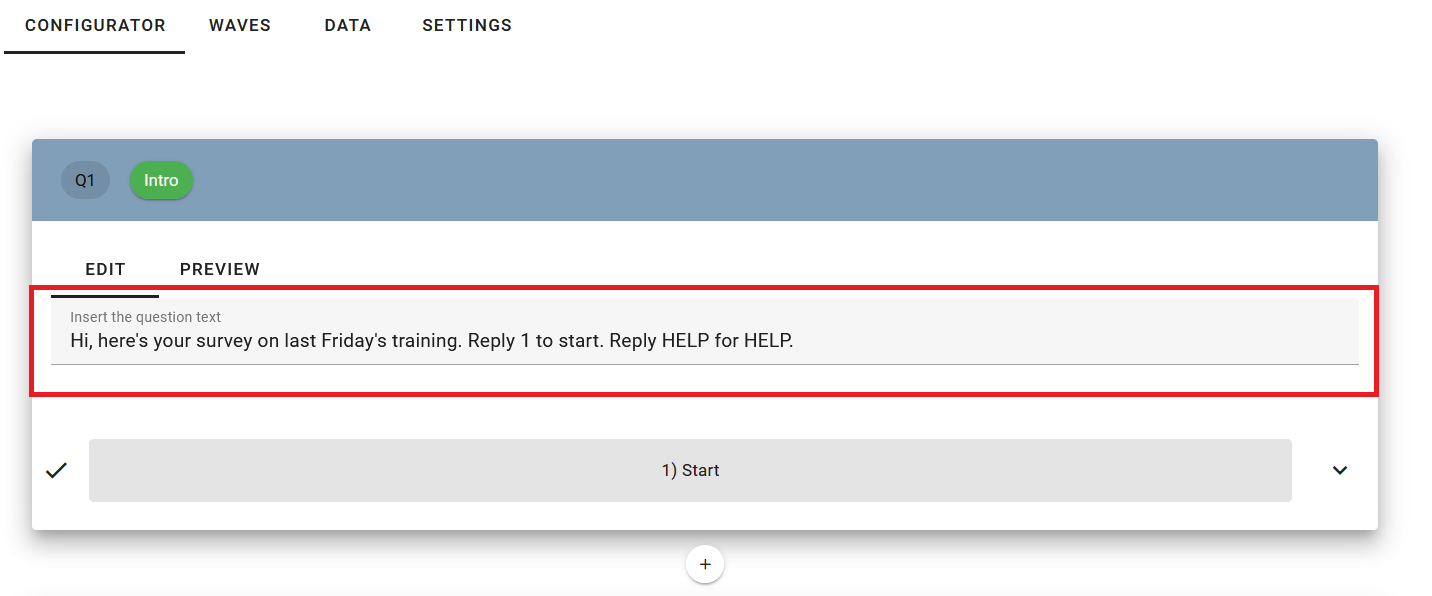
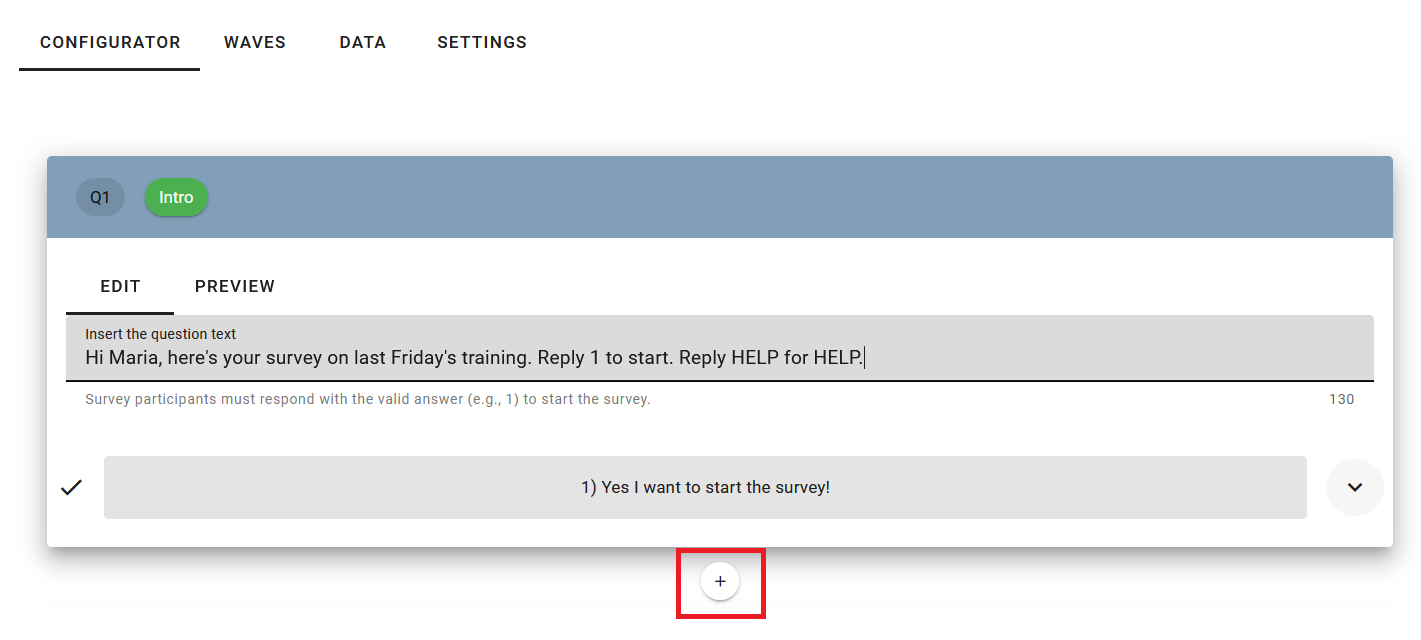
The first message serves as an introductory message for your survey recipients. It invites them to participate in the survey and provides key information (e.g. who sends the survey, how many questions, how to learn more - and incentives, if any). Type your introductory message in the marked field.
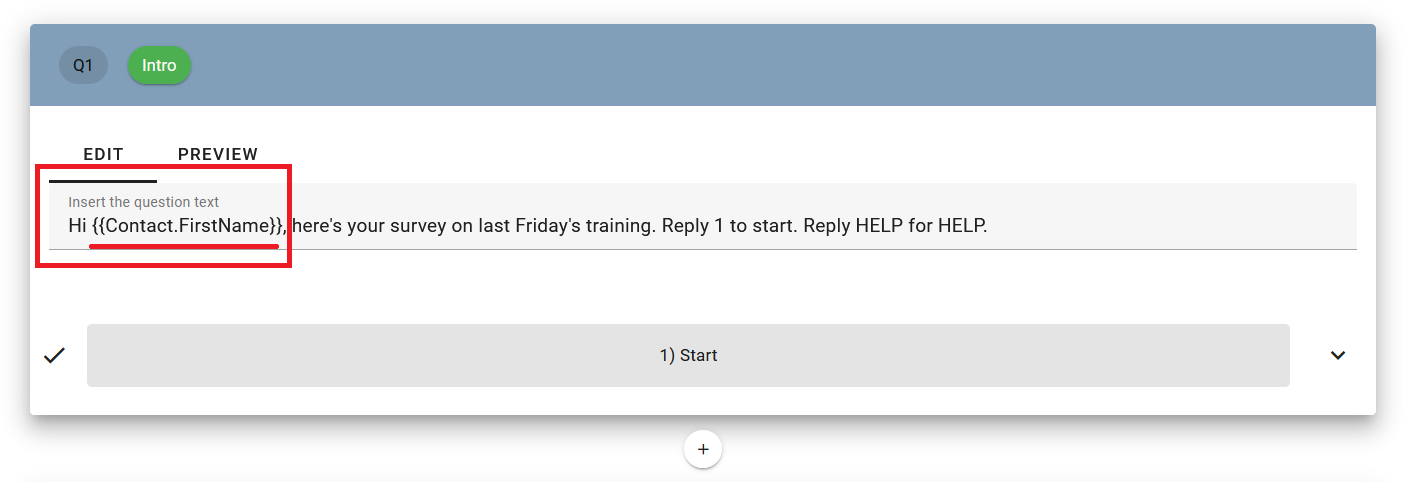
Optional (but recommended): Personalize your introduction message.
Your message is likely to receive more attention if you personalize it to the recipients. You can automatically include the information you have on each of your contacts, for example the first names of your contacts (and survey recipients). To do that simply add a placeholder value like this: {{Contact.FirstName}}. When your survey is sent, it
is automatically replaced by the name of the respondent. For example "Dear {{Contact.FirstName}}" becomes "Dear Maria" for all contacts
with first name Maria.
4) Adding your first survey question
To add your first survey questions, click on the "+" sign below the intro message.
Click on the field "Question type" and click on the question type you would like to add. Let's assume you want to create a "Single Choice" question and click on the respective button.
Next, type your first question in the field "Insert question text". For example, you may want to start with a simple yes/no question on whether survey recipients were satisfied with their training.

Now define the question settings and answer choices (in our case: yes vs no). To do that click on the downward-pointing arrow.

Scroll-down and define the answer options. In our example case (a simple yes/no question) define two answer options - one for yes, and one for no.
Valid reply / Text: This part allows you to define what kind of
answer you expect, usually a number. Working with numbers makes data
analysis easier at the end.
Text: The text field explains the reply (for example replying with 1 means YES).

Add your additional answer options. Repeat clicking on "Add Answer" if you require more answer options.

5) Adding further questions
To add further questions, click on the "+" sign below your previous question.
Important: Then click on the "+" sign (marked with red square), which means that all survey participants receive this question, regardless of their prior response. If you want to include a conditional logic, you don't have to click on the "+" sign in the red square.
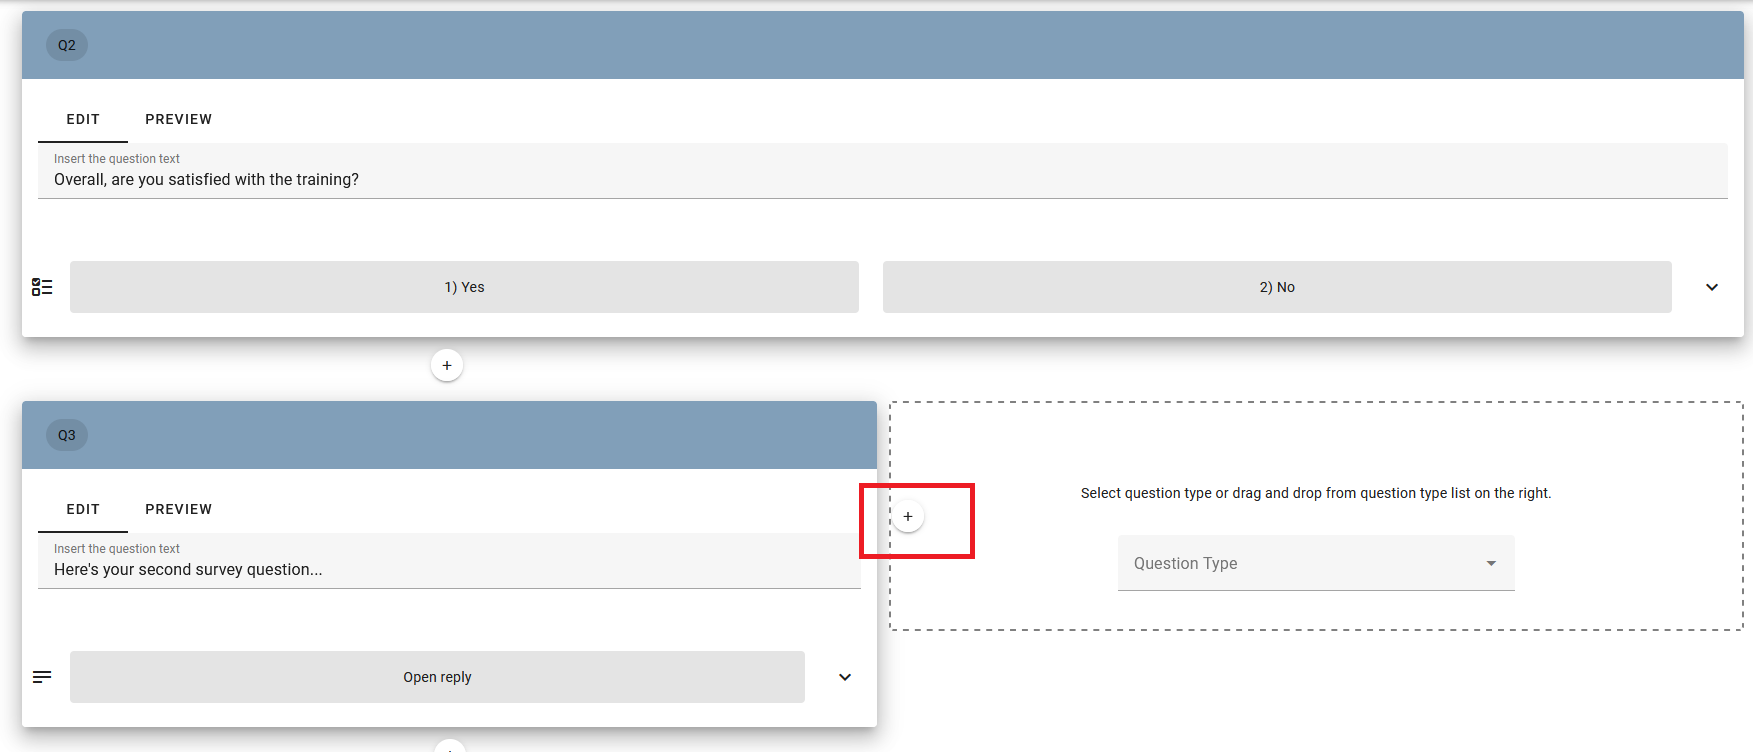
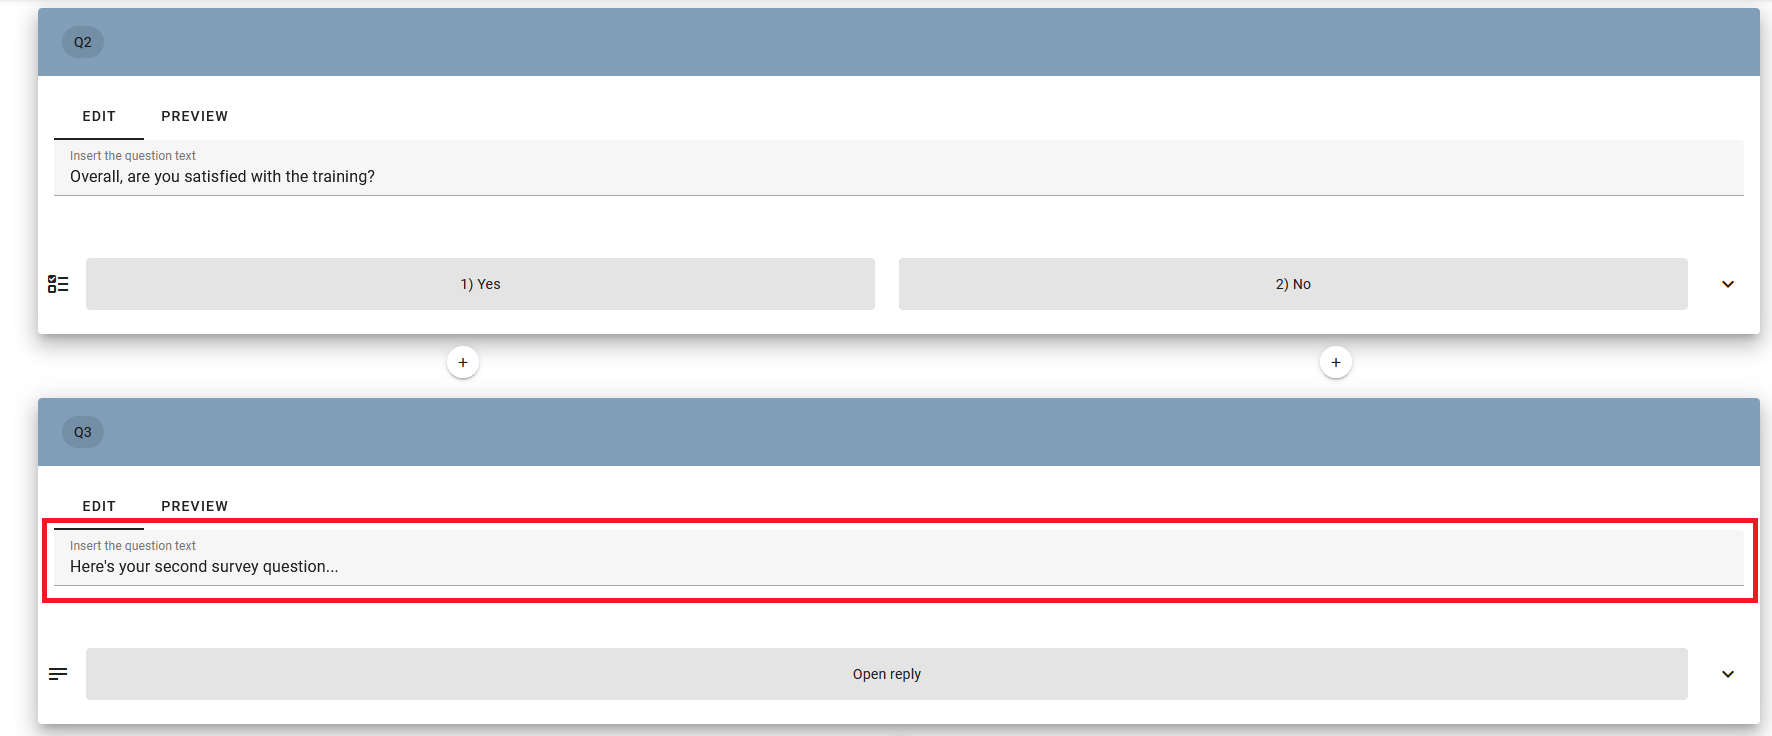
Now you can write your second question as explained in section 4, above. Repeate this process until your survey is completed.
6) Finish with your outro message
Your outro message is added automatically. If not, click on the "+" sign after your last question and select question type "Outro".
Important: Make sure that all survey recipients have an outro message. If you see a "+" sign on the right of your outro message, click on it. The outro message is than widended, which means all survey participants - regardless of their prior responses - receive the outro message.
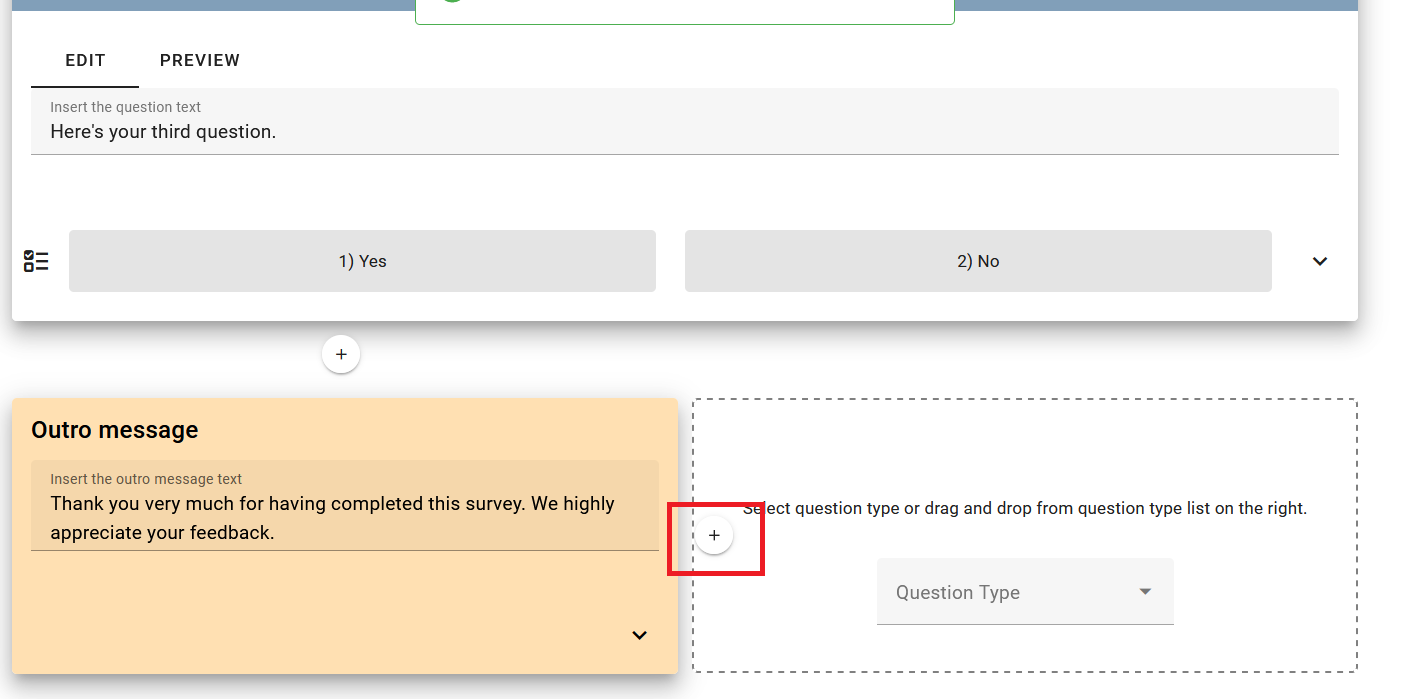
Then write your outro message thanking participants for their participation.

Done, now you are read to test and then send out your survey.
Was this article helpful?
That’s Great!
Thank you for your feedback
Sorry! We couldn't be helpful
Thank you for your feedback
Feedback sent
We appreciate your effort and will try to fix the article